Rebuilding 2060
The idea.
Since I was already building rails and grates to use in my project to resurrect 2682, I offered to make an extra set for a member of the local fleet whose boat needed new woodwork if he'd pay for materials (Note: If you don't have access to a full woodshop already, order your rails from GMW. The power tools are expensive and the your other half will prefer to not have a rail jig in her parking spot.) He wanted to get his boat fixed, and I wanted to get him racing again in our fleet races. My goal was to have him make it to the 2007 SCAL Thistle Districts that we were hosting in AZ March 10-11. By the time I had things ready, March 3-4 was the only weekend left. Could we rebuild a thistle in under a week?
Removing the old Rails
Bill brought his boat over Saturday morning about 10am, running behind because of road construction (He lives on the other side of Phoenix-an hour drive). I hoped to get mostly done on the weekend so it'd be ready to race next Saturday.
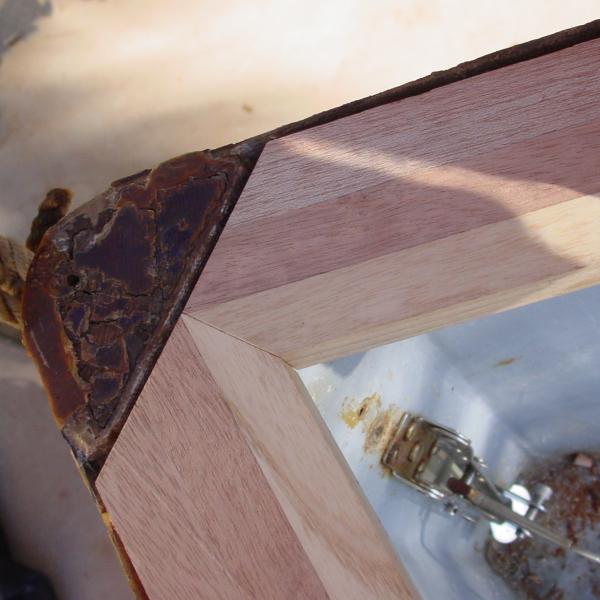
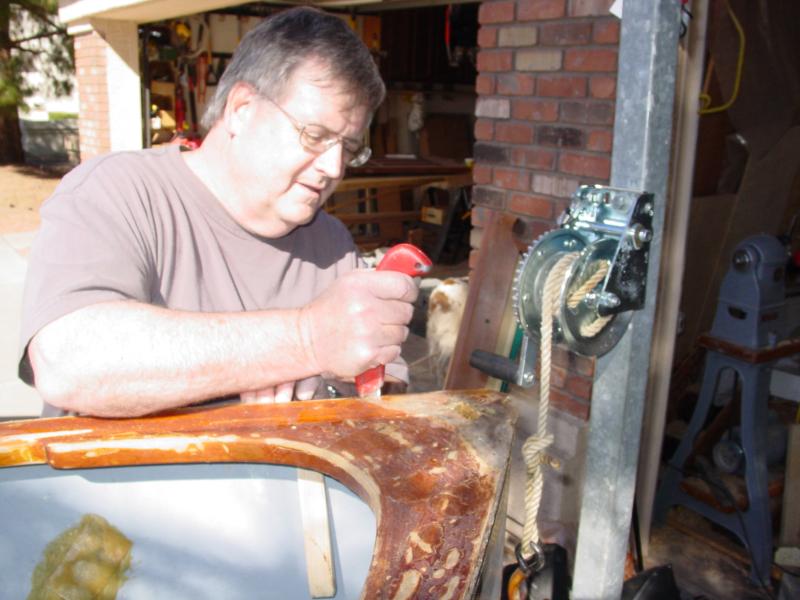 We started taking off the old rails and grates.
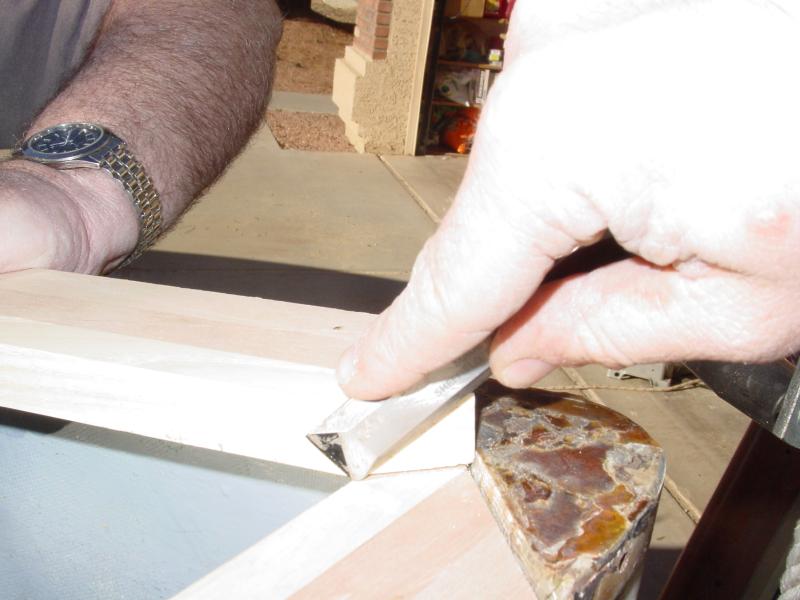
The wooden wedges created when scarfing the ash parts of the rails worked great for
prying between the rails and hull to get them off. We took off his remaining outwale then spent some time making some spreaders and cauls we'd use later when putting on the new rails.A utility knife served to finish off stubborn areas near the bow and stern. We removed the stern first as it made it easier to free the bow.
We started taking off the old rails and grates.
The wooden wedges created when scarfing the ash parts of the rails worked great for
prying between the rails and hull to get them off. We took off his remaining outwale then spent some time making some spreaders and cauls we'd use later when putting on the new rails.A utility knife served to finish off stubborn areas near the bow and stern. We removed the stern first as it made it easier to free the bow.
 To finally remove the rails we cut them at the spinnaker turning blocks. Just how badly the boat needed new woodwork was apparent when we cut through the starboard side with 3 pulls on the saw. The port side broke without sawing. As we lifted out the rails, they broke again where the shrouds pass through them. It was 2pm before we got the rails out of the boat.
Fitting the new rails
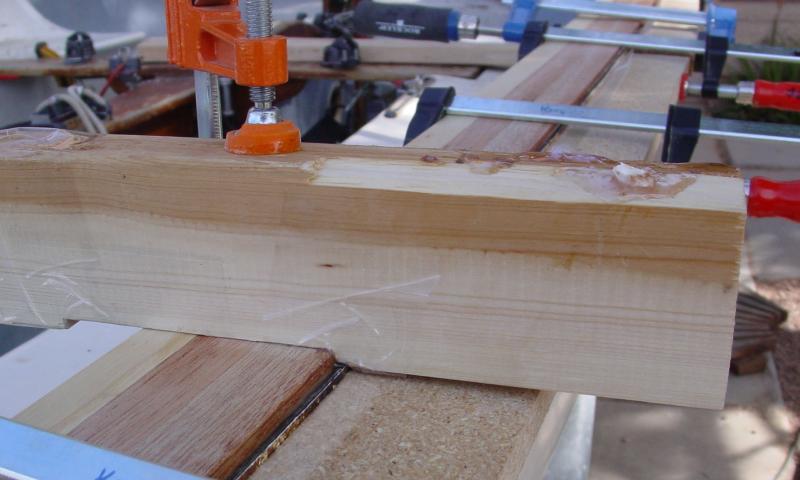
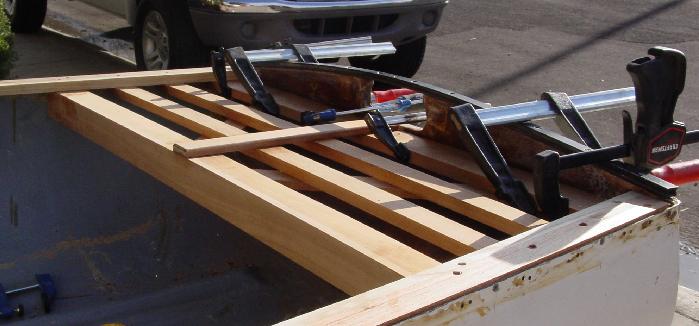
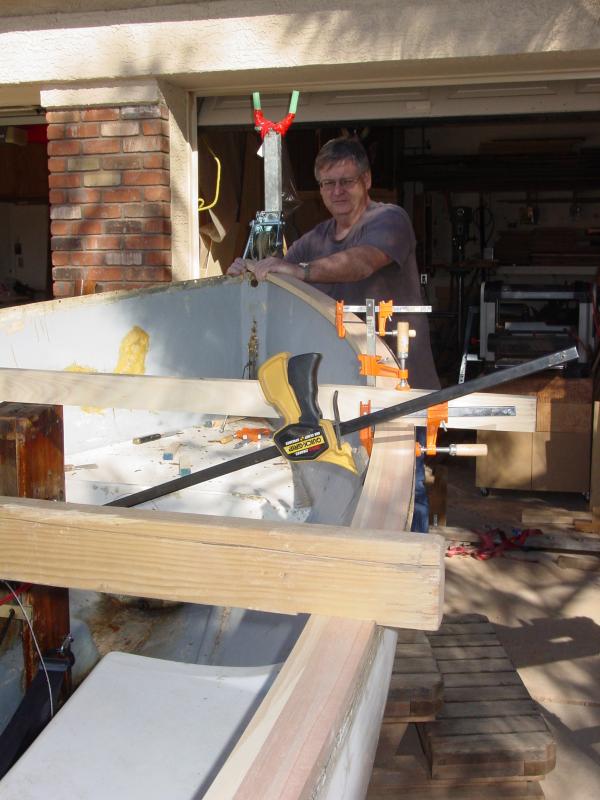 We spent several hours finding the position where the rails' curve best
matched the boat. You can see the spreaders we made earlier in the pictures. They're
notched so they actually ride on the glass hull-this ensures the rails are
positioned at the proper height while keeping the hull at the proper width, and also
keep the rails flat. We set the rails at 3/16" above the hull because they were 13/16"
thick. Originally, the rails were 3/4" thick and 1/8" above the rail. While this seemed
like a good idea to keep the rails matched to the flat part of the hull, it created some
minor problems up near the stem, which only extended 1/8" above the hull. If I did
it again I'd keep the rails 1/8" above the hull and spend time trimming them to fit the hull.
We spent several hours finding the position where the rails' curve best
matched the boat. You can see the spreaders we made earlier in the pictures. They're
notched so they actually ride on the glass hull-this ensures the rails are
positioned at the proper height while keeping the hull at the proper width, and also
keep the rails flat. We set the rails at 3/16" above the hull because they were 13/16"
thick. Originally, the rails were 3/4" thick and 1/8" above the rail. While this seemed
like a good idea to keep the rails matched to the flat part of the hull, it created some
minor problems up near the stem, which only extended 1/8" above the hull. If I did
it again I'd keep the rails 1/8" above the hull and spend time trimming them to fit the hull.
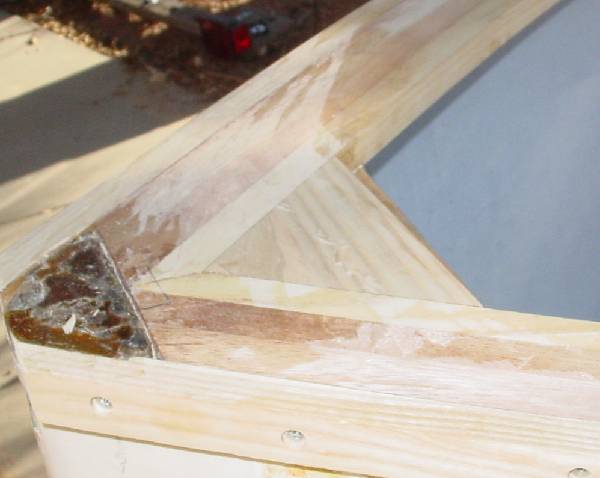
After matching the curve, we cut the rails to match the stem (we scribed them from below and cut on the miter saw) and rechecked the fit. Then I used a square to scribe the centerline on the port rail and cut it on the miter saw. The final (starboard) bow cut was scribed to match the port side cut so we had a great fit. One thing we forgot to do here was trim the outside edge of the inwale with a block plane to improve its fit to the hull. Since the Schock mold goes very vertical at the top, this wasn't catastrophic.

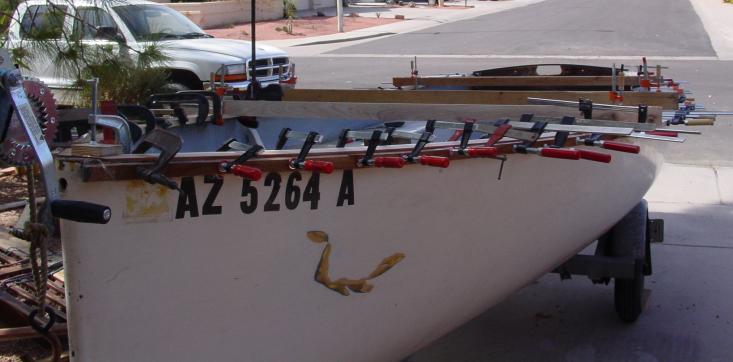
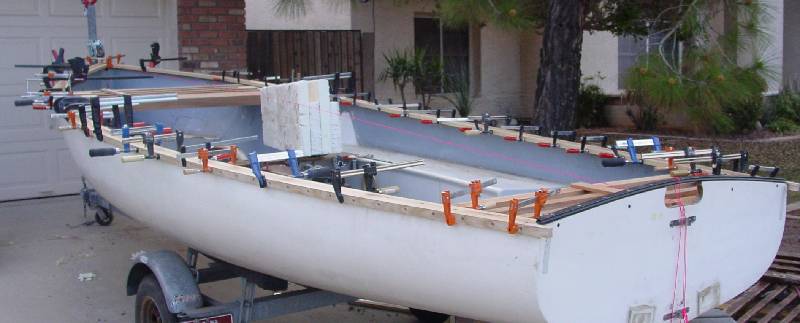
Once we had the bow fit, we cut the rails to length. I eyeballed this, and wish I'd been more careful. It worked, but the fit could have been tighter on starboard. Final trimming was done with a block plane. We drilled the pilot holes for the screws, then pre-soaked the rails with epoxy. The cool weather really helped us by extending the open time of the epoxy. After they'd had over 30 minutes to let the resin work into the wood, we went back over them with a mixture of resin and microfibers. This would help the resin wick further into the wood and should fill any gaps between the rail and the hull. We screwed it to the hull with 3/4" #8 stainless steel screws, then used a lot of clamps and the cauls we'd made earlier to squeeze everything together. I wished for a couple more boards (one or two near the bow and one near the stern) to help help keep the rails flat. It was after 7 and getting very dark as we put on the last clamps. After 9 hours of work we were way behind where I'd hoped and real tired.
Sunday
Other obligations kept us from starting at dawn on Sunday, and honestly, we were stil tired from Saturday's effort. I started by taking a few pictures showing all the clamps we'd used the day before. Note the packing tape on the spreaders. Don't forget this anywhere you have something you don't want stuck permanently touching the epoxy.
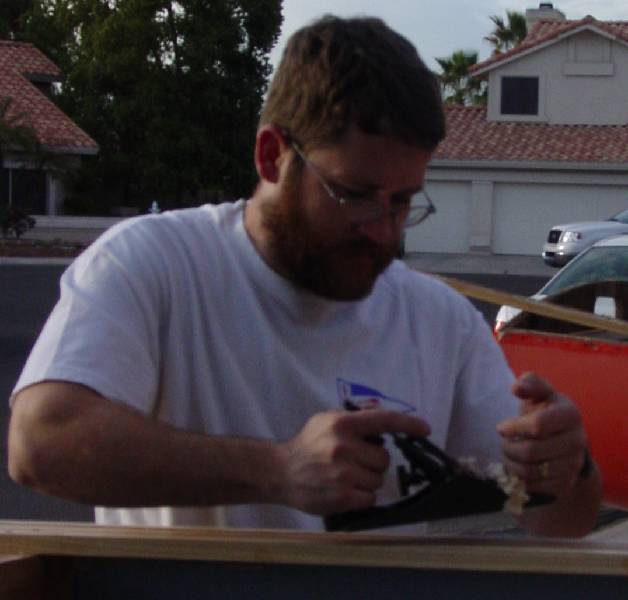
I started worked on finishing up the rear grating. I needed to add the cleat on the bottom at the back since I'd overlooked this earlier. Since I'd made the 45 braces extend all the way to the back, I had to make the cleat from 3 pieces. I also had built the grate too wide (on purpose) so it could be trimmed to fit Bill's boat.
 When Bill arrived at 1pm he started taking the clamps off the hull and sanding any places
where the resin had dripped down the inside of the hull while I finished the rear grate and
laminated the piece that would become the top of the stanchions. After trimming the grate to match his hull, we installed it with resin/microbers, screwed through the cleat to the transom and through-bolted to the rails. This had taken us several hours, but
it was amazing how stiff the hull had already gotten.
When Bill arrived at 1pm he started taking the clamps off the hull and sanding any places
where the resin had dripped down the inside of the hull while I finished the rear grate and
laminated the piece that would become the top of the stanchions. After trimming the grate to match his hull, we installed it with resin/microbers, screwed through the cleat to the transom and through-bolted to the rails. This had taken us several hours, but
it was amazing how stiff the hull had already gotten.
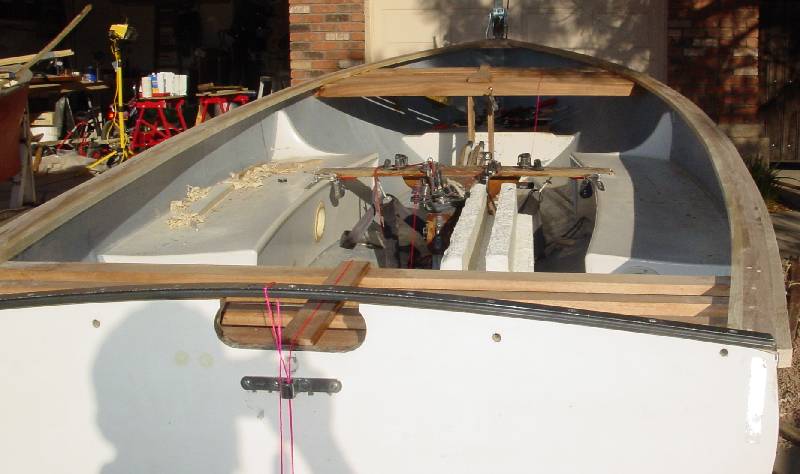
 With the stern grate in, we turned our attention to the forward grate and stanchions. We started by roughly trimming the front grate to size, then stretching a centerline from the stem to stern to ensure we had the mast step, stanchions, etc properly centered. In the picture you can see the spacer blocks I used when building the grates. The boards had twisted a bit, and we kept these in place to keep the slats aligned. Here we ran into the most serious problem of the rebuild. The hulldidn't measure the same from our centerline to both rails (It was about 1/4" off). Bill said he thought the boat had always sailed better on one tack, while I wondered if somehow the rails were slightly asymmetric. We measured, shifted the grate, leaned on the boat, applied a spreader clamp, rechecked the string placement, and measured again, all with no success. We ended the day planning to consult other Thistlers about what may be causing the issue and possible ways to fix it.
Monday
Bill and I checked with others and hoped Skip's suggestion was correct: The boat was twisted sitting on the trailer. When I got home, I started working on the outwales. I'd scarf jointed pieces of ash into 20'+ pieces, but they still needed planing to thickness and shaping to fit over the rails and match the slope of the hull. Bill ended up working late, so I planed the outwales and setup the tablesaw cut them to fit the hull (tilt the blade 4-5deg and set the fence so you're removing about 0.10" at the top). I cut and glued in the block that joins the inwales at the bow, then spent the rest of the evening working preparing for districts.
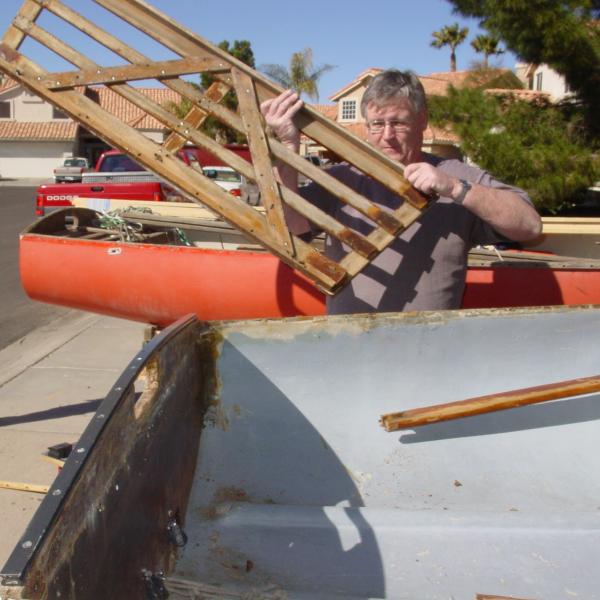
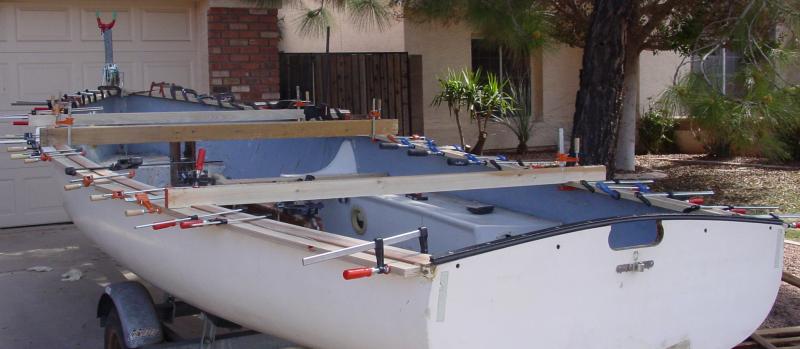
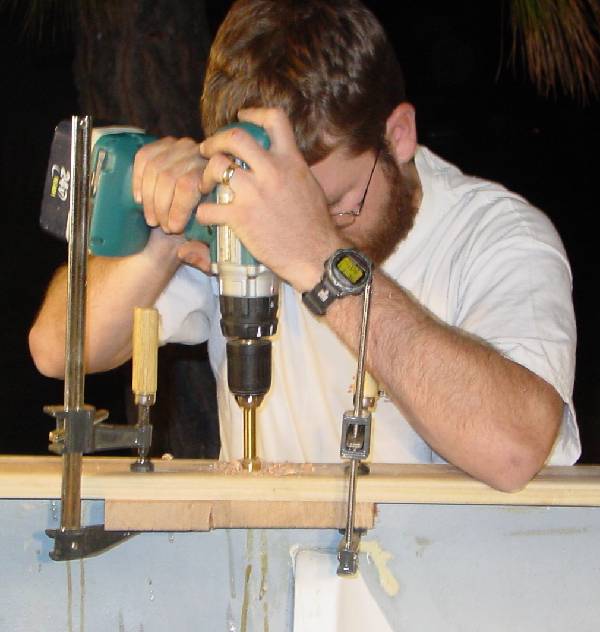
If this boat can make districts, so can yours.
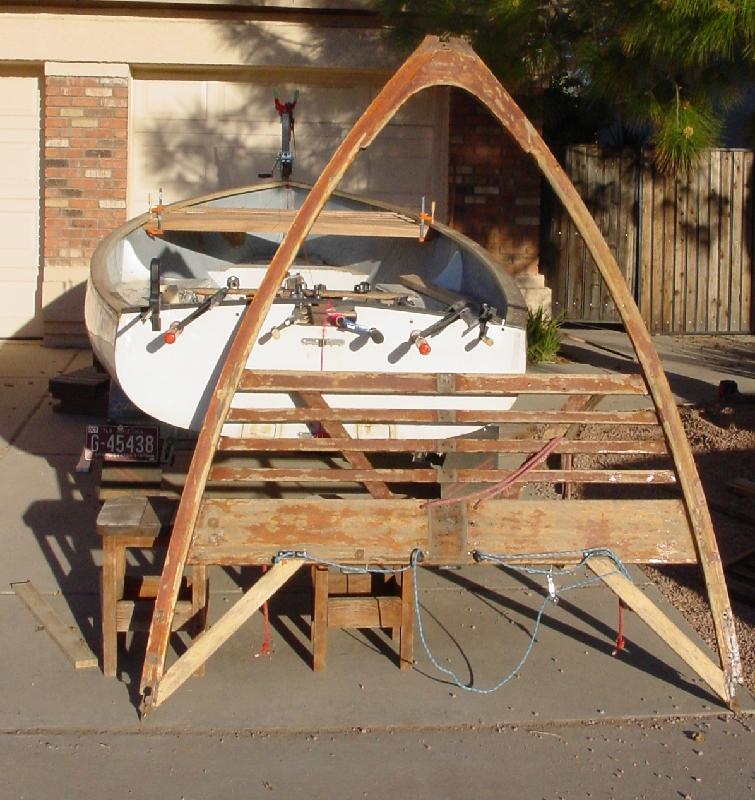
To encourage those who might say "My boat's not ready-I can't make districts.", I sent out an email with this picture of Bill's boat and the subject: "If this boat can make districts, so can yours."
Tuesday
I met Skip for lunch and borrowed his digital level to test the theory about the boat being twisted. On getting home, I checked the boat, and sure enough, the front and back grates were a fraction of a degree different -- and in the right direction to cause our measurement errors. Whether that was enough twist to account for the error, I don't know.
While I waited for Bill to arrive, I notched the outwales to match the hull on the tablesaw and started cleaning up the joint between the hull and inwale with a cabinet scraper- I wanted to make sure there was a clean right angle. When Bill arrived he cleaned up the outside of the hull, then we recruited my brother to help us attach the outwales- one would clamp the rail in place, a second would drill the pilot hole and countersink, and the third would drive the screw. We broke 3 drill bits where we kept hitting the inwale screws (despite checking where they were to miss them). Next time, I'll check where the outwale screws are going to be and remove any inwale screws (like the one at the stern). The challenge on the outwales was at the bow and stern. The stem and transom require some more fitting than most of the hull- which I could have done better. It was after 10pm when we had the rails attached and everything cleaned up. Bill nearly nodded off on his drive home-the long hours of work were taking a toll.
Wednesday
 Before Bill arrived I got out my hand plane and trimmed the outwales flush with the inwales. This was easy, and left a nice, level surface. I also got out my dial caliper and measured the rails to see how close they were to the maximum width of 3.25" -- they measured 3.24" which left just a little room for varnish.
 The main objective for the day was simple enough: get the front grate and stanchions installed. Bill started by attaching the hardware to the new stanchions (Much easier to do when they are accessible and you can use the old ones as templates). After lots of measuring, remeasuring, rechecking, we had the stanchions and grating in. We through-bolted the grating to the rails, and screwed the stanchions into the keel with 3" stainless steel screws. I added a second block to the bow (changing from the original Schock design to the design used by GMW on 3521--my boat). By the time we were done, it was nearly 11pm, but we could see the home stretch.
Thursday
The boat was nearly back together, and we were glad for it. Bill got off work early, and brought over a laminate trimmer to round over the rails, and a template bit. We started by installing the mast step. I misread the measurement form and set the mast step too far forward (I read the measurement for a wooden mast). There's enough play in the mast step Bill will just have to block it back.
I used the template bit along with a curve jig to trim the bow blocks while Bill rounded over the grates. He found out that the unfilled screw holes let the guide bearing sink, creating a divot in the rails so we only rounded the portion where the shroud plate went. We used the old rails/grates as a template to mark the holes for the shrouds, made sure to put a backer board, then drilled them with a forstner bit. As it turned out the 1/4" bit was the wrong size to round over the rails with- we should have used a 3/8". We filed the grates to match the shroud plates then screwed them into place.
It wasn't completely done- we didn't (don't, actually) have the 45deg braces in, or the rails rounded over, but with a little more work by Bill it would be sailable for districts. By 9pm Bill had the boat loaded up and was on his way home.
Districts
Bill did make it out for districts. However, upon launching he discovered a few rigging issues that prevented him from racing on Saturday. Sunday's races were abandoned due to heavy winds. But on our next regular race weekend Bill made out and raced with the fleet. So the real goal of this project- get Bill back racing- was accomplished.
Notes
Preparation
Rebuilding a boat is much like painting -- if you want a good result you need to spend time preparing. To do it in under a week, you'd better have the prep work done ahead of time. I had built the new grates and new rails over several weeks, and still wasn't completely finished with them. I'd also read over several web pages to glean what information I could. There were still details I missed- like the cleat on the bottom of the stern grate and the fact that the rail roundover was 3/8" instead of 1/4", and the amount of time needed to remove the old rails. These weren't catastrophic, but I would have planned better and had more ready ahead of time.
Speaking of time...
I tried mentioning when we started/stopping to give an idea of how many hours of labor were involved. Trying to add it all up gives an estimate of 60-65 man hours. Most of the time it was just Bill and myself working, but at a few places we recruited help from my brother. This project basically required putting everything else on hold-- when we got done early Thursday, I was able to tuck my daughter in for the first time all week.
Practically speaking, a 3 person crew would be good, more than 4 would probably only be necessary when gluing up the rails (One marking/clamping, one drilling the pilot holes, one driving the screws, and one cleaning up drips/creating a fillet. On the inwale you should have predrilled the holes.) - and then you could do 1 or 2 teams of 3-4 people. So if your fleet has a "repair Jack's boat" party, you can divide things up.
I do think that it could almost be done in a weekend, although I'd prefer three days. If you had everything ready ahead of time, you could do the inwales on Saturday, the bow and grates Sunday, and the outwales Monday-- leaving the rounding/plugging for later. You might be able to do the grates and half the rails on the same day, but I'd prefer not to be wiggling things while the epoxy sets.
Materials
My choice of materials for the rails was dictated largely by what I could aquire. I used Merenti mahogany (a kind of philipine mahogany) for the inner 2 layers of the rails because it's what Frost Hardwoods had in 20'+ lengths (which I wanted so I didn't need scarf joints). It was inexpensive, and light, but had a habit of breaking when bending to form the rails (I had one piece snap straight across the grain with no visible defect). It also tended to tear strings out when we were drilling the 3/8" holes for the bolts. It was also so soft that it dented anytime you bumped it. You can tell where the spreader bars were-- the dent in the soft mahogany is still visible. I kept the rails as thick as I could- 13/16" instead of the nominal 3/4" (I'd have kept them 1" if I hadn't had to plane out defects). I've since found a 20' piece of merembe mahogany (also a phillipine mahogany, I believe) which is browner and seems stronger. If I build more rails (beyond the set I've already done for 2682), I'll use this. Frost did have an 18'2" piece of teak-had it been 19' I'd have grabbed it.
The ash for the inner/outermost should protect the mahogany as long as it's glassed over on top. I was able to find 10' and 12' pieces of ash locally, enabling me to keep the scarf joints well offset. I built the grates out of african mahogany because the 6-8' lenghts available locally were adequate, and it was resonably light while being more durable than the merenti of the rails.
The stainless steel screws we used came from Marsch Fasteners. They were far less expensive than any brass screws, and actually cost less than many regular screws. The only issue was that they were machine screws, not traditional wood screws (well, that and I'd have preferred square drive to philips). They were threaded their full length, meaning they wouldn't pull the two pieces together- everything had to be clamped tight before inserting the screws.
Questions? Comments? Suggestions?
If you have a question on what I did, or how I did something, please ask. If you have a comment or suggestion on why you think something I did was wrong, stupid, or clever, let me know. I certainly don't know as much as I'd like about rebuilding Thistles and can learn more. I also hope that the information here will be useful to others. That's why I try to point out my mistakes--so others won't repeat them.