Building Fiberglass Thistle Cradles
by Chris LaBorde
When making the cradles for my trailer, I went for stiffness, padding, and good drainage away from the hull. I didn't use wacky wood just because I wanted to minimize any maintenance I might have out of this trailer, but it sounded pretty slick when I read about it.
Positioning the cradles
To position the cradles, I looked at a couple of things. There is a rule of thumb thatyou want to support horizontal pipe in transit on a bumpy road 20% from the ends. The approximation I applied was a twelve inch wide cradle that caught the rear part of the bow tank and the stanchions within those twelve inches. For the rear cradle I wanted the twelve inches to span the rear end of the seat tanks and the centerboard trunk. These positions were both close to the 20% marks and covered large structural parts of the boat.
Building the "mold"
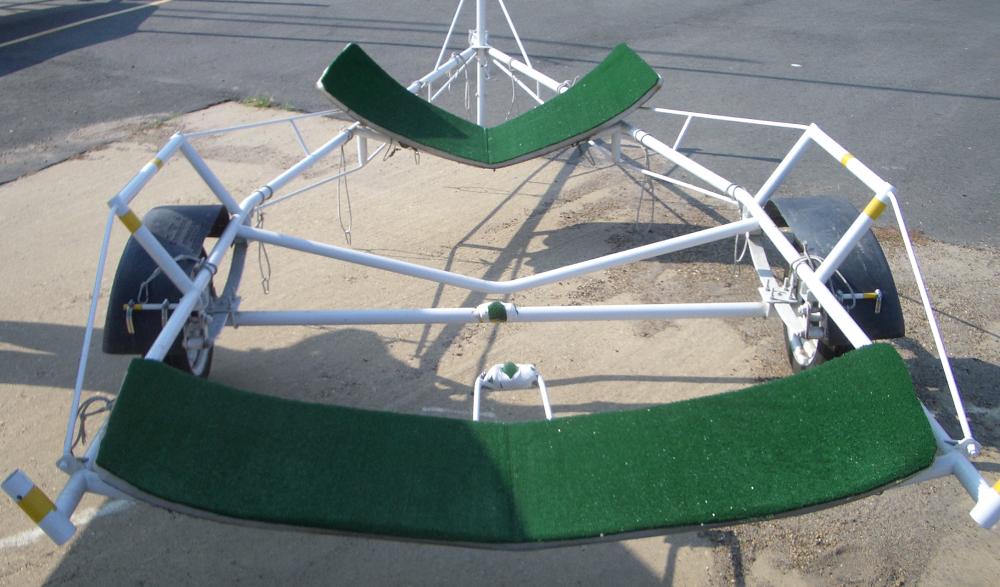
I knew I wanted to pad it with a closed cell foam and a very open weave outdoor carpet for shock absorption and to prevent blistering. This required that I make the more rigid parts of my cradles away from the hull with the appropriate spacing.
I took 1" thick 4'x8' foam sheet from Home depot and cut the rough shape of the cradles in four pieces and then slit them cross wise every three-quarter to quarter inch to get them to bend smoothly over the hull. I then used packing tape and firmly secured the foam cut outs to the hull. This was then covered in waxed paper.
Laying up the cradles
I started by laying laying roving over the "molds". I used four layers of roving, which produced a fairly flexible structure over a wide span and then took blue conduit flexible tubing (Smurf tube) and conformed it transverse to the hull centerline over the roving. I put four 1" tubes on each structure and then laid three layers of glass cloth over the four stiffners. Just like old glass hull stiffners these gave the structure plenty of thickness and strength. After the resin had cured I attached the 1" thick closed cell foam and outdoor carpet to the top sides.
Instead of tubing a person could easily take a 2"x12" and translate the shape onto the board (plum-bob and a sharpie) and use a saws-all to cut the pattern out. They would then have to used some filler and fiber glass tape to get a more snug fit from the glass to the board. Before I would support a 12" wide cradle with a "2inch" cradle cut to fit I would consider making a sandwich with a coring material and some more glass though.
Attaching to the trailer
To align the cradles on the trailer, I took small ratchet straps and attached the cradles to the hull, hung it over the trailer, then figured out how to fit the trailer to the boat and cradles.
I bent the trailer frame tubes to roughly match the cradles and then bridged the gaps with a polyester resin/dynahair (aka "kitty hair") mixture. This turned out to be problematic as such a large batch has to be made up at once to fit a trailer. The cradles aren't securely bonded to the frame because the dynahair never completely cured. The biggest gap is 1"x1"x1", so I need to figure out something that can have strength in that volume.
If you were using a board you could affix the board to the trailer and then goup it up with a filler and then set the boat with cradles and pads into the goup (Filler) and then lay glass flanges in to secure the bond.
Notes
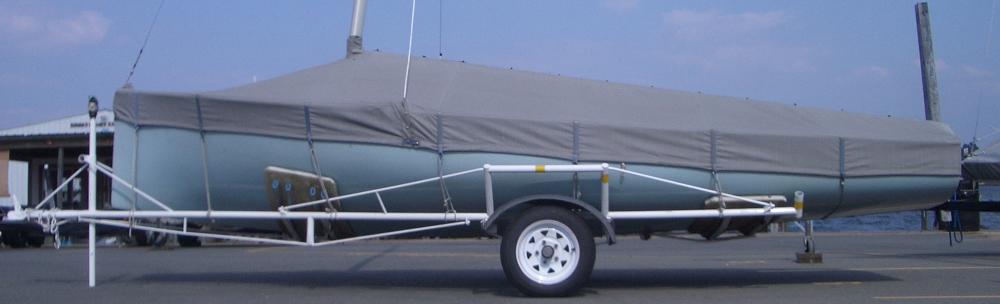
The trailer isn't perfect, but it works great. At the 2007 Jubilee regatta we were able to hand launch the boat on the ramp both in and out. It was awesome. We didn't do as well as we'd have liked in the races so it was nice to not have to worry about any lift lines.